I have developed my own method of fusing fabric that fuses the edges only. I thought I'd show you how I do it.
I have tried Wonder Under and other similar fusibles, but I just don't care for the stiffness, especially since I am often fusing three layers or more. I experimented with glues that could be used just on the edges, which I liked better, but those edges were very stiff. I finally found a liquid fusing product called Liquifuse. Initially I found it very difficult to use, and nearly gave up on it, because it was thick, would clog the opening on the bottle and it was hard to control. Having little to lose, I experimented, discovered that the product is water soluble and when thinned with water it is much more workable.
Here are some of the things I will be using:
- pastel pencils in the oatmeal tin—these are not regular colored pencils, they are thicker and softer
- line drawing of my design.
- diluted Liquifuse in a small bottle with a fine tip. (That's the Liquifuse as you buy it, in the bottle with the red label) The proportion is probably about 1 part water to 2 parts Liquifuse. It's not a careful measurement. I add enough water that it flows nicely, but isn't water-y. Sorry I can't be more specific than that.
- light box. You can tape your design to a sunny window if you don't have a lightbox.

Put the drawing on the light box and lay your fabric, face down on top, so you can see the design. Remember that the finished design will be the reverse of what you are seeing. For the black part of my crow I am using a black fabric with a dark gray design on it. I will use a white quilt marking pencil to trace the lines of the black parts of the crow on the back of the fabric. If I were using a lighter colored fabric, I would trace it with a black permanent marker.
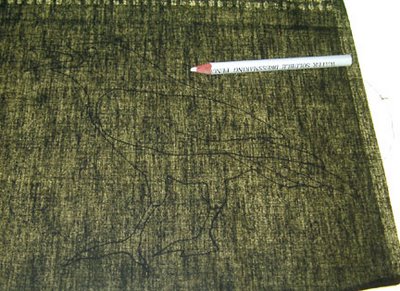
Run a line of the Liquifuse just inside the traced line. For the inside lines on the wing, I will put the liquifuse on both sides of the line, as I will be cutting away a narrow section of line in those areas.
When you have traced all of the design with Liquifuse, lay the fabric on an ironing surface, with the Liqui-fuse face up. Lay a teflon ironing sheet over the top and press with a hot iron until the fabric fuses to the sheet and the Liquifuse is no longer wet. The Liquifuse can be allowed to dry before you do this step, but it isn't necessary.
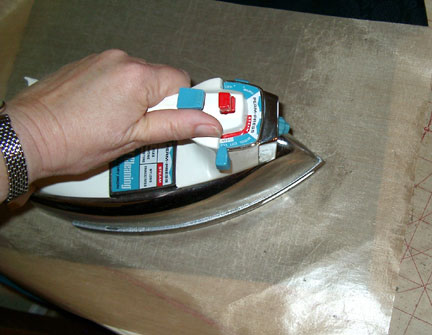
Allow the fabric and ironing sheet to cool slightly, then carefully peel the ironing sheet off the fabric. You will see that you have a line of shiny fusing material outlining your design on the fabric.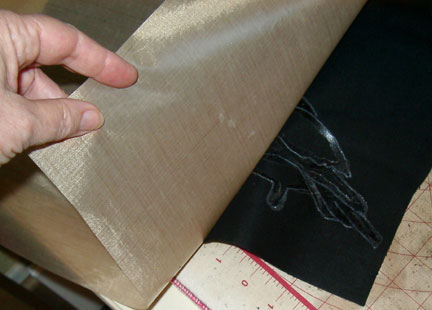
Carefully cut along the marked line. The melted Liquifuse seals the threads and you will have a clean, non-ravelling edge. At this point you have a design element that can be fused to a background if you wish. I like to fuse each element to a piece of black or dark fabric that I will cut to create a dark outline.
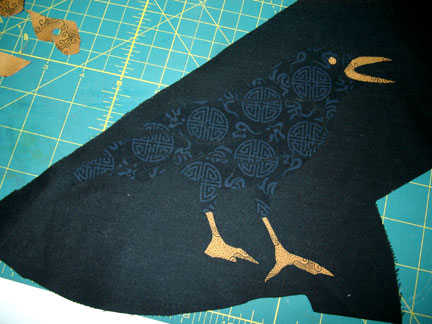
After I have fused the black and gold parts of the crow to the black scrap, I like to add detail, shading and dimension with pastel pencils. I have used fabric paint for this step as well, but I like using the pastel pencils because I don't have to wait for paint to dry to see what the actual color will look like.
To get my black outline, I flip the crow over on the light box and simply apply the Liquifuse on the back, following the outline of the fused pieces.

Again, I iron the teflon sheet to the back of the piece, cool it and peel off the sheet. Then I cut the bird out, leaving a narrow edge of the black fabric all the way around. The black also shows through where I have trimmed out the wing lines.
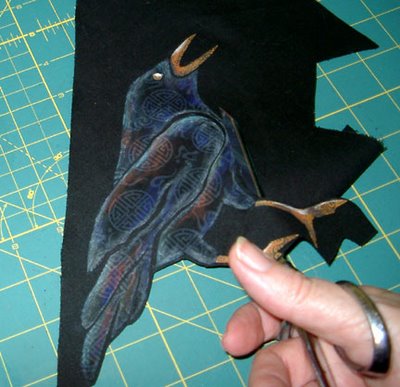
Now I am ready to fuse the bird to a background.
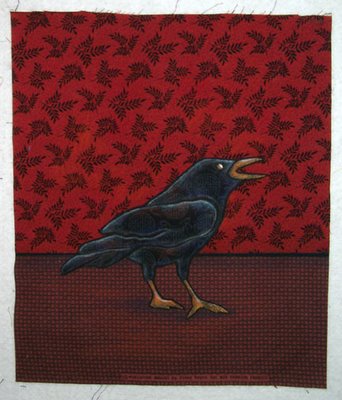
For most pieces I use a narrow zigzag stitch around all the fused edges. Occasionally I use a straight stitch just inside the fused edge instead. The piece seems to tell me what kind of stitching will work best. If I am planning to quilt very heavily, sometimes I don't use any kind of stitching on the fused edges.
 The pastel pencil needs to be set or it will smear and eventually rub off. I have used two methods for this. You can use very thinned down acrylic medium to paint over the colored areas. This secures the pastel and leaves the fabric relatively soft. I find that it sometimes dulls the pastel and can discolor black and dark fabrics, so I have started using spray fixative. It makes the fabric slightly stiff, but it softens up as you handle it and is still easily sewn through. (not nearly as stiff as a piece fused with Wonder Under) It seems to keep the colors nice and clear and does fix them. Use this outdoors. It really smells and I'm sure is not nice to breathe. The smell dissipates as it dries.
I buy the Liquifuse and plastic, pointed tip bottles at Michael's crafts. I have also found Liquifuse at some fabric stores—usually not quilt shops. I buy the pastel pencils and fixative at an art supply store.
© Terry Grant, 2006





 I was a little bit thrilled at how well the paisley (yes,


 On the QuiltArt mailing list people talk about finding their artistic “voice” or developing their own style, and I have struggled with that myself and tried out quite a few styles for working. In “Art and Fear” by David Bayles and Ted Orland I came across this thought and it struck me:
 that work. But that is not our work.